![]()
This how-to is created during the course of documentation of happyBoot
v3.0.5 Beta released during the grand celebration of Software Freedom
Day 2010 by NOSK.
Let us start with creating a directory where the content and image shall
be built.
Inside the folder you have created, create another directory ‘root’ to
represent the root of the DVD we are building. This directory is our
working directory.
Download the latest syslinux source tar file from kernel.org:
http://www.kernel.org/pub/linux/utils/boot/syslinux/
Inside our working directory, create /boot folder.
/boot shall hold files related to booting, i.e. the boot menus, kernels,
initial ramdisks, etc.
/boot/isolinux shall hold isolinux files.
Extract the downloaded syslinux archive, find the following files. and
copy them to /boot/isolinux.
chain.c32
isolinux.bin
memdisk
menu.c32
vesamenu.c32
reboot.c32
isolinux.bin is the boot loader file. menu.c32 is required only if we
are creating the menu in normal mode where background images and other
graphical options are not possible. vesamenu.c32 provides support for
background images and other graphical options and we are using this type
of menu. memdisk can emulate disk images as disks. It can be used to
boot the system off floppy images and even smaller CD ISOs. syslinux has
many other files COM32 images with .c32 extensions which are used after
booting for various purposes. reboot.c32 is used to reboot the machine.
There are other files like gfxboot.c32 which we are not including here.
gfxboot supports more advanced, powerful and high-graphics menu but
requires complex scripting and needs them to be archived, so it’s little
difficult creating and testing multi-boot DVD.
mkiso.sh script included here is the script for generating ISO image. It
uses mkisofs for image creation.
Edit it with your favorite text-editor to specify the location of the
output image after -o switch and the root location of the CD (where
/boot/ is located) at the end of the line.
Save the scrpt in system path (e.g. /usr/bin) with executable
permission.
This will save our time. When we execute mkiso new image will be
created at the specified location using boot/isolinux/isolinux.bin as
the eltorito boot image.
Also. for testing purposes, we set up a virtual machine. VirtualBox or Qemu should be the best option.
The setup is done by now.
The major work lies in integration of the distributions.
Our first job while integrating an OS into our mult-boot DVD is to
understand its boot loader.
Almost all linux distributions use ISOLINUX as the bootloader. ISOLINUX
files are generally located at /isolinux/ or /boot/isolinux in the boot
media.
I would recommend you to read the online and offline syslinux and
isolinux documentation and references before continuing. The offline
source should be the documents inside the syslinux archive which you
have just downloaded.
Let’s start our integration with DSL (Damn Small Linux). We mount it’s
ISO image and browse to the root of its CD image. We see isolinux is
located in /boot/isolinux. We copy everything else into our working root
except the boot folder because /boot/isolinux would conflict with ours.
So, we create /boot/DSL in our location where we copy the contents of
/boot/isolinux from DSL image. Since, we have changed the location of
DSL boot configuration files, we have to edit isolinux.cfg in /boot/DSL
and add /boot/DSL to every file location. Otherwise ISOLINUX would
search it in /boot/isolinux instead. So lines like DISPLAY boot.msg are
edited to DISPLAY /boot/dsl/boot.msg, KERNEL linux24 to KERNEL /boot/dsl/linux24,
KERNEL memtest to KERNEL /boot/dsl/memtest.
Also, we have to edit initrd=minitr24.gz to initrd=/boot/dsl/minitr24.gz in the APPEND lines.
Now, we are going to add an entry of Damn Small Linux in our mult-boot
menu. The configuration file for multi-boot menu is
/boot/isolinux/isolinux.cfg.
See the file menu.txt for help and reference on ISOLINUX menu
configuration inside the doc folder of syslinux archive.
The following lines have to be used.
LABEL dsl
MENU LABEL ^1. Damn Small Linux v4.4.10
KERNEL vesamenu.c32
APPEND /boot/dsl/isolinux.cfg
TEXT HELPMENU LABEL would show in the menu while booting.
Text between TEXT HELP and EXNDTEXT would be shown as help text in the
bottom.
This entry loads vesamenu.c32 COM32 Image with /boot/dsl/isolinux.cfg as
parameter. This infact means load another ISOLINUX menu (sub-menu).
Now, we can create the image with mkiso and test if it boots OK in
VirtualBox. It should.
The ^ key before 1, sets 1 as the hotkey for selection of this
menu. Use it before any character to make the character the hot-key.
Similar should have been the ways of integration for most OSes. But, unfortunately different techniques are used by different OSes making our job difficult. Ubuntu Desktop Edition and openSUSE use gfxboot which I couldn’t load directly from vesamenu.c32 (Error setting up gfxboot, or something like that was returned as error, there has to be a way). So, we need to create submenus for them ( not a difficult job, if you are good with GRUB or any other bootloader) and create entries for them in the main menu. Boot files of Ubuntu were copied to /boot/ubuntu. The boot files of openSUSE exist in /boot/i386/loader which was let in its own location. isolinux.cfg was edited to and absolute path of file names were written. This step is necessary with every distro integration because our bootloader searches the files in its own folder otherwise.
Fedora has its boot configuration in /isolinux but kernel on /EFI (the
kernel and memtest in /isolinux are 0 bytes). So, all files except
kernel and memtest were copied to /EFI. isolinux.cfg was edited
accordingly and pointed in /boot/isolinux/isolinux.cfg like done for
DSL. Fedora kernel won’t find the live file system unless we specify the
append CD label to the kernel. We need to edit all APPEND lines in
/EFI/isolinux.cfg and use root=live:happyBootv3 parameter (without
quotes). We are assuming happyBootv3 is the CD/DVD label name. You can
change it in mkiso script.
Integrating UBCD is easy. We just need to point the sub-menu to /ubcd/menus/isolinux/main.cfg.
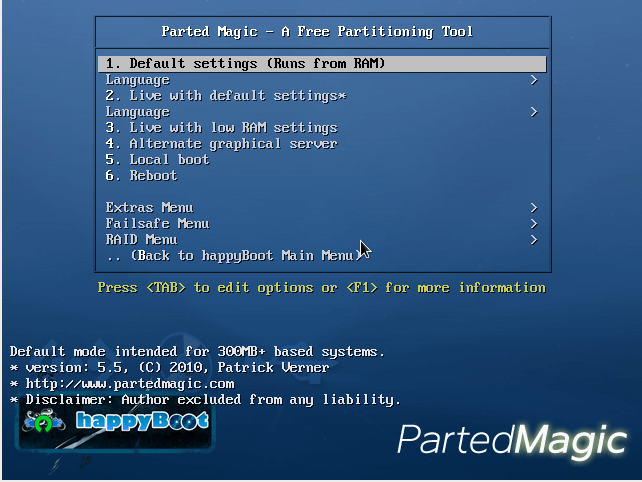
UBCD has Parted Magic inside it. If you need to integrate Parted Magic by yourself because you don’t want UBCD or if you want the latest version, then you can copy /boot/isolinux from Parted Magic ISO to /boot/pmagic, similar to what we did with DSL. Copy other contents into our working directory (pmagic is the only other folder). Edit the /boot/pmagic/isolinux.cfg file like we did for DSL and then point to this menu from /boot/isolinux/isolinux.cfg. We can also edit the UBCD menu to link to the updated Parted Magic.
GeexBox is a wonderful under 20 MB complete multimedia OS. Its ISO has only folder /GEEXBOX in it. Copy it into our multi-boot DVD root. Its isolinux configuration files are located in /GEEXBOX/boot. We edit /GEEXBOX/boot/isolinux.cfg to use absolute path for kernel and initrd files. We also add it into our menu /boot/isolinux/isolinux.cfg.
Finally, we customize the boot menu looks.
We will look after each entry used.
MENU BACKGROUND /boot/isolinux/main.jpgMENU TITLE happyBoot v3.0b SFD10 ReleaseMENU COLOR title 1;36;44 #ffff0000 #00000000 stdMENU ROWS 14F1 /boot/docs/help.txt
See menu.txt inside doc folder in syslinux archive for more references.
Make the changes, execute mkiso and boot the image.
If you aren’t using mkiso script, take care:
mkisofs -U solves ubuntu problem of ‘unable to find live file system’
error.
mkisofs -U -R solves the problem with DSL – can’t find KNOPPIX
filesystem problem.
This document has not been written to deep details and therefore may not be useful to beginners. Also, this job has no huge complexibility that it requires an advanced user. This how-to was written as a part of documentation for the DVD release of happyBoot v3 done in Software Freedom Day 2010 organised by Nepal Open Source Klub.
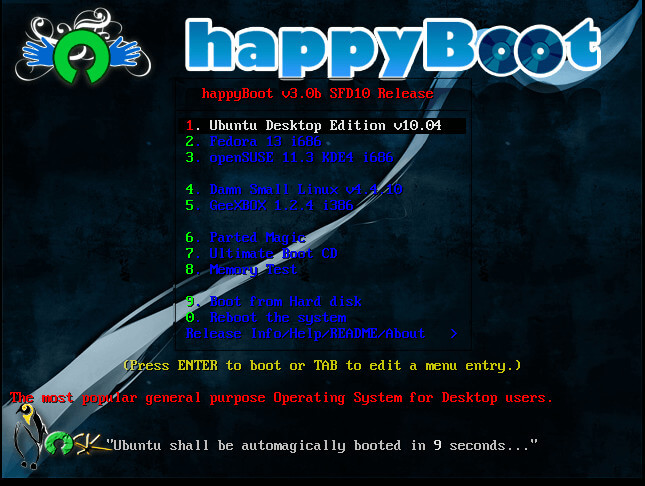
Screenshots:
The main menu:
One of the sub-menus (Parted Magic):